HELLO
Mom to Iris. Wife to Todd. Our little family lives at the foothills of the Ozark Mountains in Fayetteville, Arkansas. We love it here and I love sharing little bits of our life.

© 2014 sarahfortune.

+

Category : Home

Loving to Learn at Home

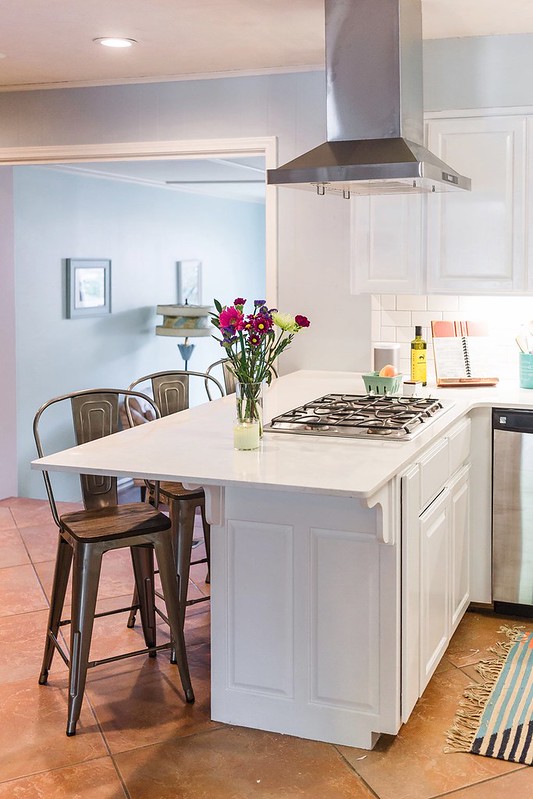
For me, having a dedicated, inviting workspace is not a luxury – it’s a necessity. So as Iris grows, I’m realizing the same is true for her. As most curious kids are, she is a knowledge seeker – always asking questions, always wanting to learn the meaning of things she doesn’t understand, and always wanting to practice her math (she did not inherit that one from me). This is her last summer before Kindergarten, so the timing couldn’t be more perfect to partner with Arkansas Connections Academy to create the perfect learning spaces in our home.

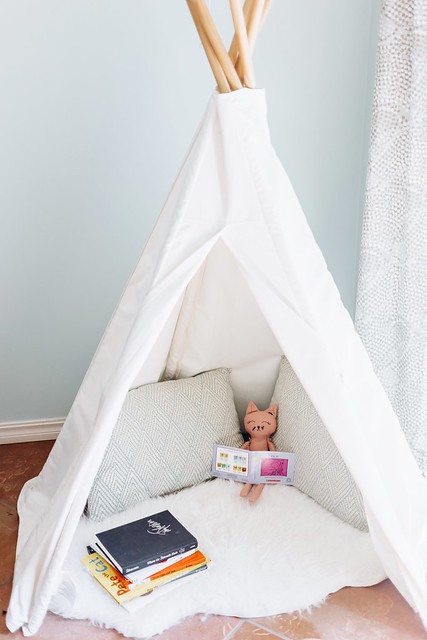
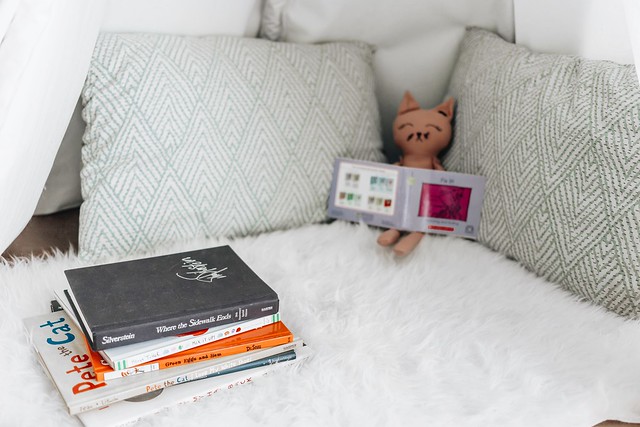
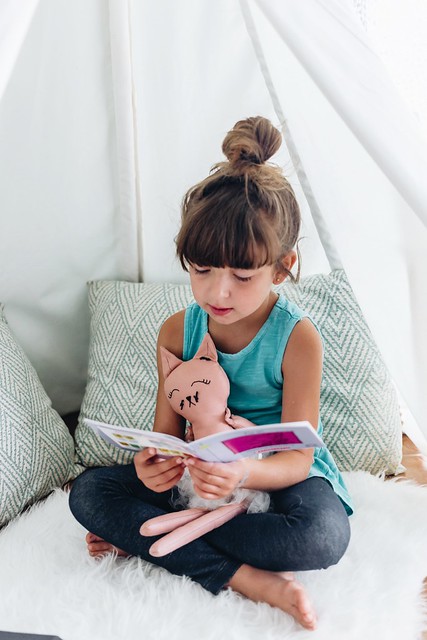
Instead of having just one designated workspace, we tailored several areas to fit her interests. Iris loves to read, so having a welcoming and comfortable space to curl up with a book was a no-brainer. Just by adding a couple pillows and a rug, we turned her play tent (which she no longer ever played with) into a cozy little reading nook. She’s reading better and better with each day, so keeping a rotating stack of books inside helps keep her interested in sitting down and staying a while.

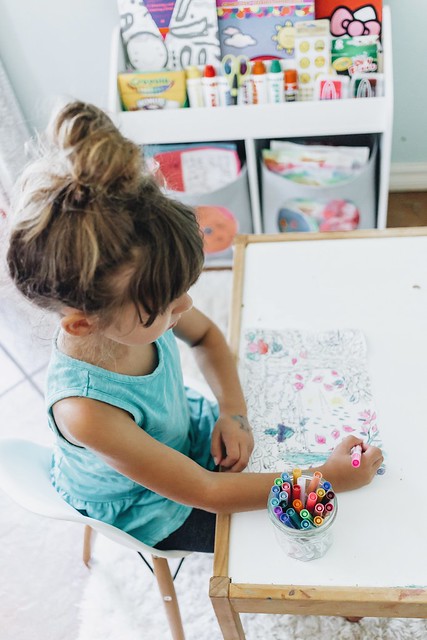
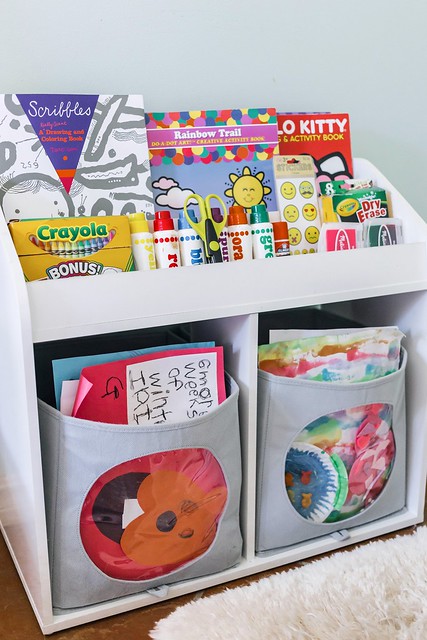
Iris considers herself an artist and, I must admit, I do too! Having a work table where it’s okay to get a little messy lets her not worry about anything so that she can just let her imagination fly. For the longest time we kept Iris’ art supplies in a big box. While my intent was to stay organized, I realized it was always a bit of an ordeal to get everything out for her. To make her art supplies more accessible, I unpacked her box into an old book cubby. Now she sees her art station everyday, which hopefully will inspire her to create even more masterpieces.

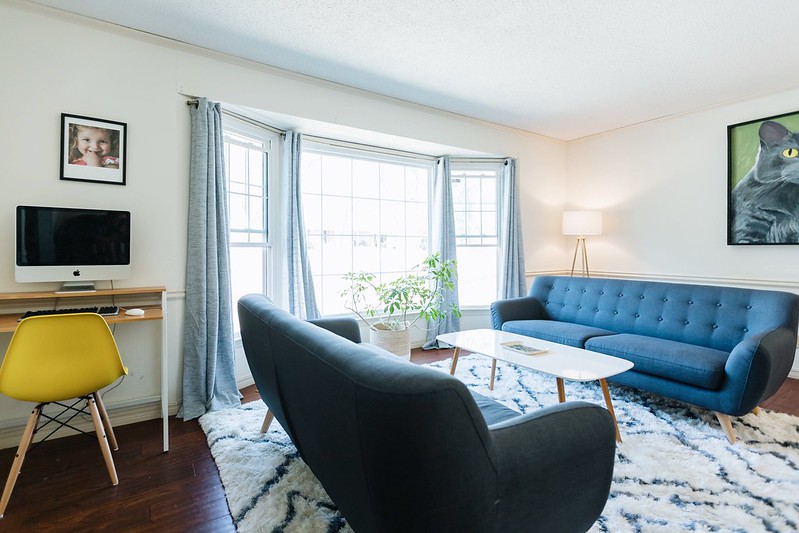
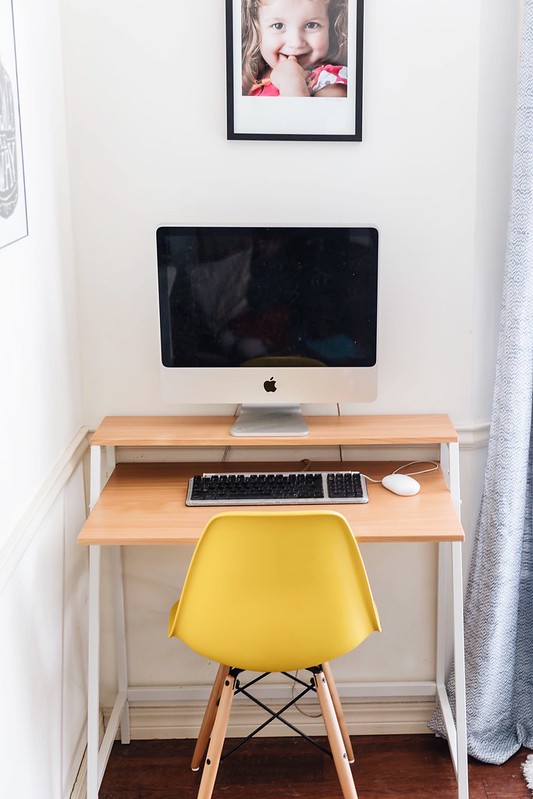
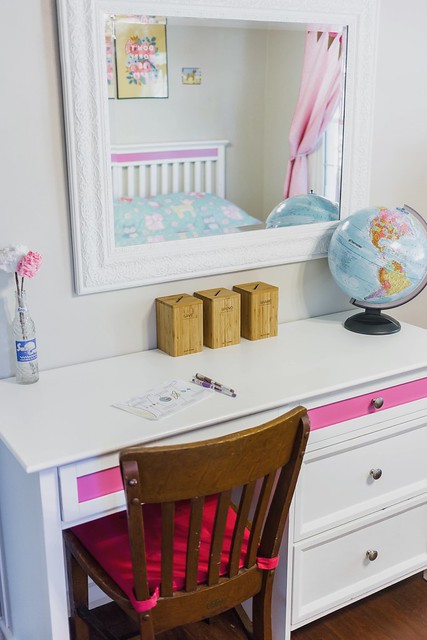
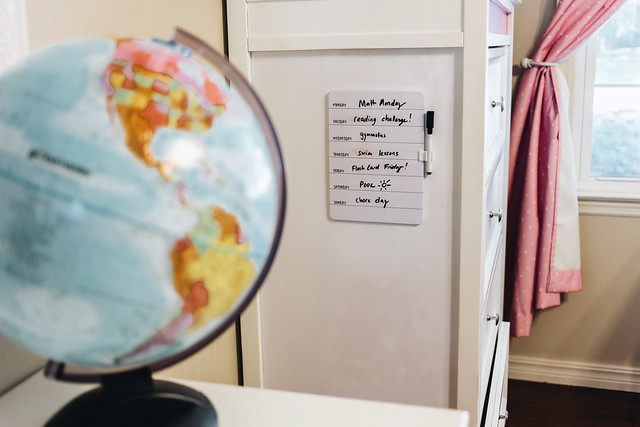
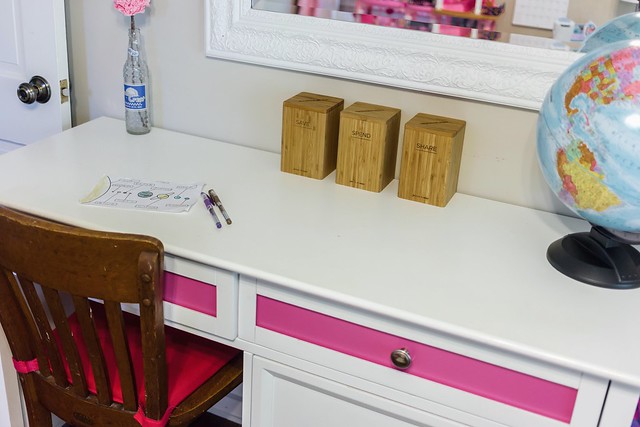
Even though I can already tell that Iris is a creative type, she does not shy away from science or math. As she grows, I hope her interest in these subjects do too. To help it along, we have a desk set up so that she can concentrate on her work, as well as a separate desk with a computer. Keeping the computer in a different space helps cut down on distractions, as well as lets me keep an eye on her computer usage.

As Iris grows, I know that these workspaces will evolve. Keeping things simple and utilizing items that I already had around the house, will allow me to change as she moves from grade to grade. And as we eagerly anticipate the start of Iris’ educational career, I’m doing some educating myself. Thanks to my collaboration with Arkansas Connections Academy, I got the chance to learn all about their virtual program. As someone who took courses from home my last two years of high school, I’m loving that there’s a quality option here in Arkansas.

So what exactly is Arkansas Connections Academy? It’s a tuition-free K–10 online public school that students attend virtually. While it goes up to 10th grade currently, the program will be adding one grade per year, so all grades will be offered soon. The school gives students the flexibility to learn from anywhere (can you say ROAD TRIP?!) with an innovative curriculum that meets rigorous state education standards.

This is a great education option for kids who are ahead or behind in the classroom, or just need a more flexible schedule. Connections Academy students not only explore and master required core subjects, but they have access to a broad range of electives, customized learning plans and courses for the gifted and talented. The part that really stands out to me is that students still get interaction with state-certified teachers, who are available via phone, email or in-person meetings. And that overall, it’s an individualized program based on each child’s needs and interests.

Still curious on how it all work? I was too! Feel free to read more on their website or connect on Facebook.

This is a sponsored post, but all opinions are my own.

BEFORE & AFTER: Exterior House Painting w/ CertaPro

You guys – I’m beyond excited to share the exterior makeover of our house in partnership with CertaPro! Thanks to the hard work of the CertaPro of NW Arkansas team, and paint courtesy of Sherwin-Williams, the exterior of our 1960s brick home is completely transformed – and we couldn’t be more thrilled with the results.

We moved into our house just over four years ago and I’ve been dying to paint the brick ever since. There’s something so fresh and clean about painted brick and I knew that our ranch home would be the perfect fit for the style. We usually take the DIY approach to our house improvements, but this was one of the few projects we did not want to attempt on our own. Partnering with CertaPro, we could not have been in better hands. Some things are better left to the experts and, as this project progressed, I realized that without a doubt this was one of those projects.

From the color consultation, to the intense house preparation – there is so much that has to be done (and be done right), before you even get to the painting stage. With CertaPro, we were kept in the loop every step of the way and knew just what to expect. I lived for my daily texts from Brandon, the project manager of our job, and I loved the “Pride Walk” he took us on when everything was complete for the grand finale. We received a complete tour of their work, along with the team making sure we were satisfied with every detail. We weren’t just satisfied – we were in love. Now, every day when I pull into my driveway, I am so happy to be home. We’ve gotten so many compliments from neighbors, friends, and even strangers, but most importantly we are somehow even more in love with our home than before. CertaPro’s moto is, “We Do Painting. You Do Life.®” And that’s exactly what we both did.

So if you are like me and are thinking about painting your house, you’ve already been stalking the Internet for the perfect colors. We had a general idea of what we wanted, but in the end it was the color consultant that made selecting the right shades a breeze. We ended up using Sherwin-Williams Loxon XP on the brick, which is ideal for harsh weather conditions when you want the paint to last. We also chose a different shade of blue for the door because it, not only paired well with the gray colors we selected, but it flows nicely with our interior as well. Here are the deets on all of the colors used:

Brick: Sherwin-Williams Mindful Gray (Loxon XP)
Dark Accent: Sherwin-Williams Gauntlet Gray (SuperPaint)
Trim: Sherwin-Williams Extra White (SuperPaint)
Door: Sherwin-Williams Hazel (SnapDry)
Deck Stain: Sherwin-Williams Banyan Brown (SuperDeck)

I will share more in another post, but for now I want to finally reveal the before, during, and after photos!

BEFORE

DURING

IMG_7526.JPG

IMG_7522.JPG

AFTER

This is a sponsored post in partnership with CertaPro and Sherwin-Williams. All opinions are my own.

Living Room Makeover – Before & After

With our kitchen renovation behind us, we needed a new (yet slightly less overwhelming/expensive) project to move on to. Ever since we moved into our house, there’s been one room that feels sort of left behind: our front living room. With three full living spaces in our ranch-style home, it never really got the attention it deserved. In fact, we literally moved the exact same hand-me-down furniture, in the exact same configuration, from our old house to this one. One of the largest rooms in the house, this front living space has a huge bay window that provides a ton of natural light. I knew it had the potential to be one of my favorite spaces in the house, but with our old, drab set-up it was my least favorite.

With the holidays behind me, I made it my mission to start the New Year with a new room and I’m happy to say that it’s officially one of my favorite rooms in the house (right behind our new kitchen). Here is our messy front living room BEFORE:

And here it is now!

Interested in where we purchased what? Here are the links:
Mid-century mod couches via Houzz
Coffee table via Houzz
Rug via Overstock
TV stand via Amazon
Baskets via TJ Maxx
Lamps via Target
Curtains via Target
Bay window curtain rods via Amazon
Yellow Eames-style desk chair via Amazon
Computer desk via Amazon

Kitchen Renovation – Before & After

We moved into our 1969 ranch home three and a half years ago. I honestly can’t believe that we have been here for that long already. We’ve made a few changes since we moved in, such as adding a window that opens up our kitchen to our den, we built a front porch to replace our concrete stoop, and of course Todd made that sweet little playhouse in the backyard for Iris’ birthday last year.

The first major project we’ve accomplished is updating our kitchen and, besides a few little things that still need tending to (paint touch-ups and such), we are almost ready to move on to our next project. My fingers are crossed for tackling the bathrooms, but even I must admit I will be a little sad to see our retro, olive green tiles go. Just a little. While I love the character of older homes, I love to mix in a modern comfort that still protects the vintage charm.

Unfortunately, our 1960s home had more of a 1980s charm when it came to the kitchen. There was a big hangy-downy thing (that’s the official name, I’m pretty sure) between the kitchen and the rest of the room, bi-level bar, countertops that were a depressing taupe color, and cabinets that I’m sure were all the rage when I was in junior high. You can see all of this clearly from the “before” photos, which are from the listing (from before we moved in):

Earlier this year we finally buckled down and got serious about our kitchen upgrades. After getting some quotes from several vendors, Todd opted to do almost everything himself. The only thing he didn’t do was install our new countertops, because that’s included in the cost per square foot anyway. This is the moment where I once again realize how lucky I am to have someone like Todd as my husband. He’s truly a jack of all trades. Need some beer? He can make it. Need a new song to love? He will write it. Need a website? Todd has you covered. Need a new kitchen? CHECK! Honestly, the list goes on. That’s not to say I didn’t do my part… I spent many a lunch hour at Home Depot and Sears spending all of our money, picking out every little last thing. Annnd besides therapeutically knocking out some ugly backsplash tile, that’s where my help ended.

So here’s the final product! Our kitchen that I love dearly. A kitchen where now my family can sit at the bar, visiting with me as I cook dinner each night. A kitchen that makes me want to cook each night. And a kitchen that also made me want to update the attached sitting room. One project always leads to another, doesn’t it? We ended up changing that area from a breakfast eating zone, to a comfy sitting area with a record player and loveseat in front of our fireplace.

Check out our progress below:

Interested in where we got our stuff? I’ve tried to source as much of it below:

KITCHEN:
Dishwasher, Refrigerator, Viatera Cortina Quartz Countertop, Rug, Sink, Faucet, Vent, Stovetop

LIVING AREA:
Loveseat, Chair, Record Player, Rug, Table & Record Stand (sorry, that is another one of Todd’s many talents – table making)